


")
The iPhone SOS mode function enables users to initiate emergency calls through their device when cellular data connectivity becomes unavailable. But when the message “SOS/SOS ONLY” appears on your iPhone screen, even though you have access to a well-covered network area, it might be a sign of a problem. Your iPhone appears to be trapped in SOS mode at this time.
Let’s determine which steps you need to solve this problem.
What Does SOS Mean on iPhone?
“SOS” or “SOS only” mode is quite a practical feature and doesn’t indicate any problems with your iPhone. The iPhone 14 model and later versions enable mobile devices to make emergency calls through 911 or 112 services even when cellular network signals become weak or disappear. The emergency call connection can be restored through satellite or mobile carrier network access.
Some iPhone users experience network restoration failures, which occur when their devices cannot connect to Wi-Fi or cellular networks in areas with stable internet access. The system experiences this problem because of software system failures or physical device malfunctions.
Can I Lose My Data When My iPhone Says SOS?
Your iPhone being stuck in the SOS mode doesn’t cause data loss per se. The constant SOS mode will drain your iPhone’s battery fast, though. As a result, you may experience unexpected phone shutdowns, with or without accidental data loss.
Another familiar scenario users encounter is attempting more advanced fixes for an iPhone stuck in SOS mode only. Thus, network resets may erase Wi-Fi passwords. Also, a full DFU restore can delete all data (unless previously backed up).
Let’s explore possible fixes for an iPhone stuck in SOS/SOS-only mode. We offer you to start with some simple (and data loss risk-free) steps and gradually move your way up to more complex fixing methods.
How Do I Get My Phone Out of SOS Mode? (Basic steps)
These steps are a first-aid solution for an iPhone stuck in SOS mode. They are considered safe for your phone and carry little to no risk to your private data.
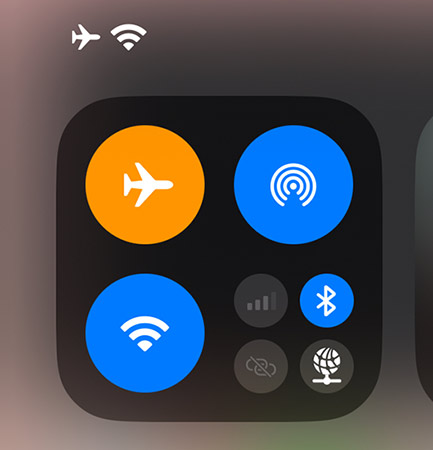
Step 1: Switching to Airplane Mode
- Swipe down to bring up the Control Center section.
- Tap the Airplane icon (it should turn lit)
- Toggle the Airplane mode off.
- Check if the SOS issue has been resolved.
Step 2: Force restart
- Press and release the Volume Up button.
- Press and release the Volume Down button.
- Press and hold the Side button.
- Keep holding when you see “Slide to power off.”
- Release the Side button when the Apple logo appears.
Step 3. Reinsert the SIM card
- Start by shutting down your iPhone.
- Check your device to locate the SIM card tray.
- Open the tray (typically on the left side) with the SIM ejector tool.
- Carefully remove the SIM card.
- Put the card back in its designated slot.
- Close the tray and switch your phone back on.
Step 4: Install iPhone’s updates
A system update requires an iPhone battery to be charged (at least 50%). A stable Wi-Fi connection is also necessary so as not to interrupt the process.
- Check for updates in Settings.

- Download and install available updates (if any)
How to Turn Off SOS on iPhone (Advanced Fixes)
WARNING! The methods below can put the data stored on your phone at risk of accidental deletion. We don’t recommend proceeding with these steps unless prior fixes have been attempted. Back up the necessary files before trying the solutions described further.
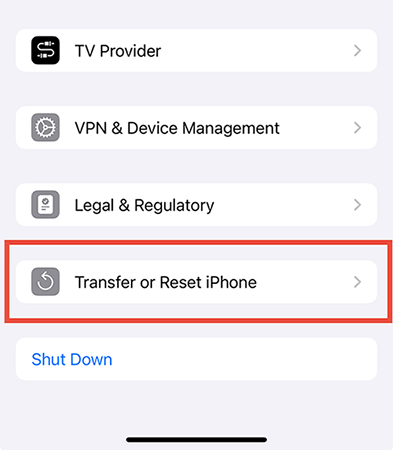
Fix 1: Perform a Network Settings reset
- Go to your iPhone’s Settings.
- Proceed to the General tab.
- Choose Reset iPhone (or Transfer).
- Confirm Reset Network Settings.
Fix 2: DFU Mode restore
DFU Mode restore will ERASE ALL THE DATA and reinstall iOS on your phone. Execute this step only if all previous solutions fail. Back up the data before proceeding to the DFU restore.
To enter the DFU Mode:
- Press and release Volume Up.
- Press and release Volume Down.
- Hold the Side button for around 10 seconds.
- Your iPhone screen should go black.
- Hold Volume Down and Side (5 seconds).
- Release Side but keep holding Volume Down for another 10 seconds.
Now, you can proceed to the DFU restore itself. One option is using iTunes to perform the DFU Mode restore. Many users find it straightforward and intuitive.
To start the restore process via iTunes:
- Connect your mobile to the Mac and start iTunes.
- Let iTunes detect the device and offer you a restore option.
- Click on Restore iPhone under software.
- Confirm the launch of the device restore.
- Once the restore is complete, iOS will be reinstalled.
- Your iPhone will get out of the DFU mode automatically.
Because this step leads to a complete data removal from your phone, it’s often seen as a last resort solution. Approach it with caution and ensure previous methods are ineffective.
Did a DFU Mode reset result in data loss on your iPhone? Try iPhone Data Recovery. These recovery tool are effective for restoring data even after a factory reset or system crashes.
iPhone SOS Mode Prevention Tips
| Regular iOS updates | Prevent minor bugs and connectivity glitches by regularly updating your device via Settings. |
| Toggle Airplane Mode | Send your iPhone to Airplane Mode periodically to refresh cellular connections. |
| Monitor your SIM status | Check if your SIM card is active. Replace it if you suspect any physical damage. |
Conclusion: iPhone SOS Mode and Data Loss
To sum up, an iPhone in SOS mode doesn’t indicate any major problem with your device. Despite this, it can definitely cause some confusion and get in the way of you performing daily tasks. The key solution is to reconnect to the network. For more complicated cases, higher-level solutions are needed after the prior backup of the iPhone.