


Occasionally, when you try to open a file or folder in Windows 11, you will get an “Access denied” error instead. Let’s see how you can fix this issue and access your data.
What is the “Access Denied” error?
The “Access denied” error means exactly what it says – you have been denied access to a file or folder. Now, the reason for this can vary.
Usually, this means that the file permissions do not allow your user account. Occasionally, it may also result from an overzealous antivirus blocking your access.
These issues are easily fixed, but the more complex problem arises when your Windows files are corrupted. This can lead to weird errors, including the Access denied bug, and cannot be easily fixed without repairing the system files.
#1: Check the User account
The first thing to check when you get an Access Denied error is the user account. If the file or folder you are trying to access belongs to a different user, you will not be allowed to open it.
To ensure this isn’t blocking access, log out of Windows and log in again using the correct account. If unsure, just pick the administrator account, as it usually has access to everything.
#2: Modify file permissions
If you are already logged in with the administrator account and still cannot access a file, it is possible that its permissions are just set to a particular user. Thankfully, this is easy to change.
- Right-click on a file you cannot access and select Properties
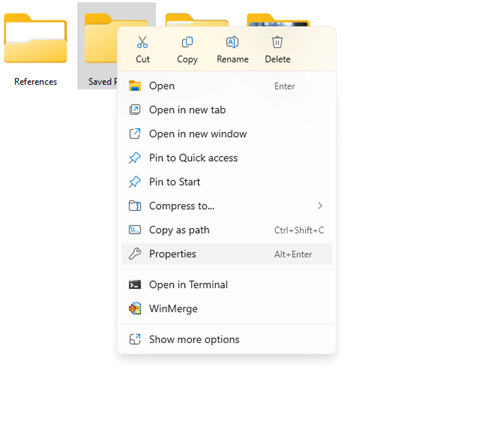
2. Switch to the Security tab, which lists the user accounts allowed access to this file.
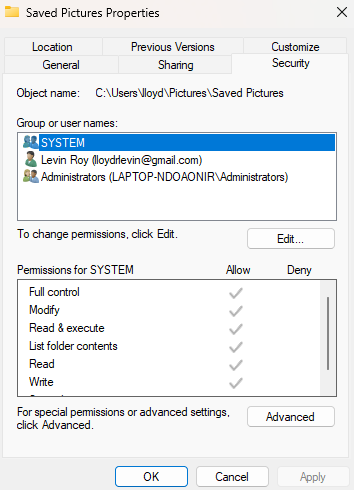
3. To add more users, click Edit and then simply select the user accounts you want to have access to this file. Hit Apply to make the changes.
#3: Temporarily turn off antivirus
Third-party antivirus is notorious for falsely flagging harmless files as risky and then blocking access to them. And unless you pay attention to the notifications, it is difficult to tell when this happens.
To rule out this possibility, it might be a good idea to temporarily disable your antivirus application and see if you can still access your file. Don’t worry, Windows Defender will still remain active, ensuring that no active malware can harm your device. You can always enable your antivirus again.
#4: Enable the hidden Administrator account
In addition to the user accounts you have created, Windows 11 has a hidden administrator account. This account has the highest level of permissions and is generally used by the OS to implement critical system changes.
You can enable this account to see if it enables you to access the blocked file. To do this, follow these steps:
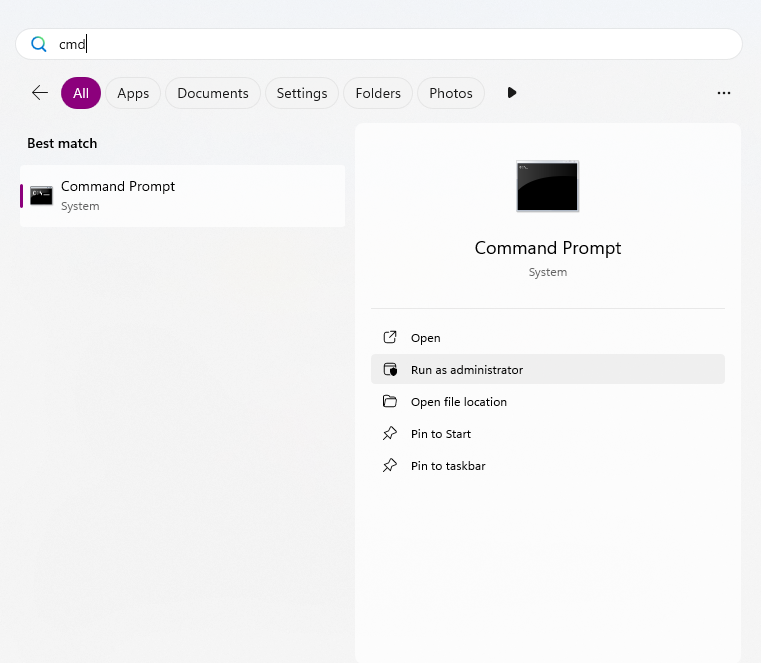
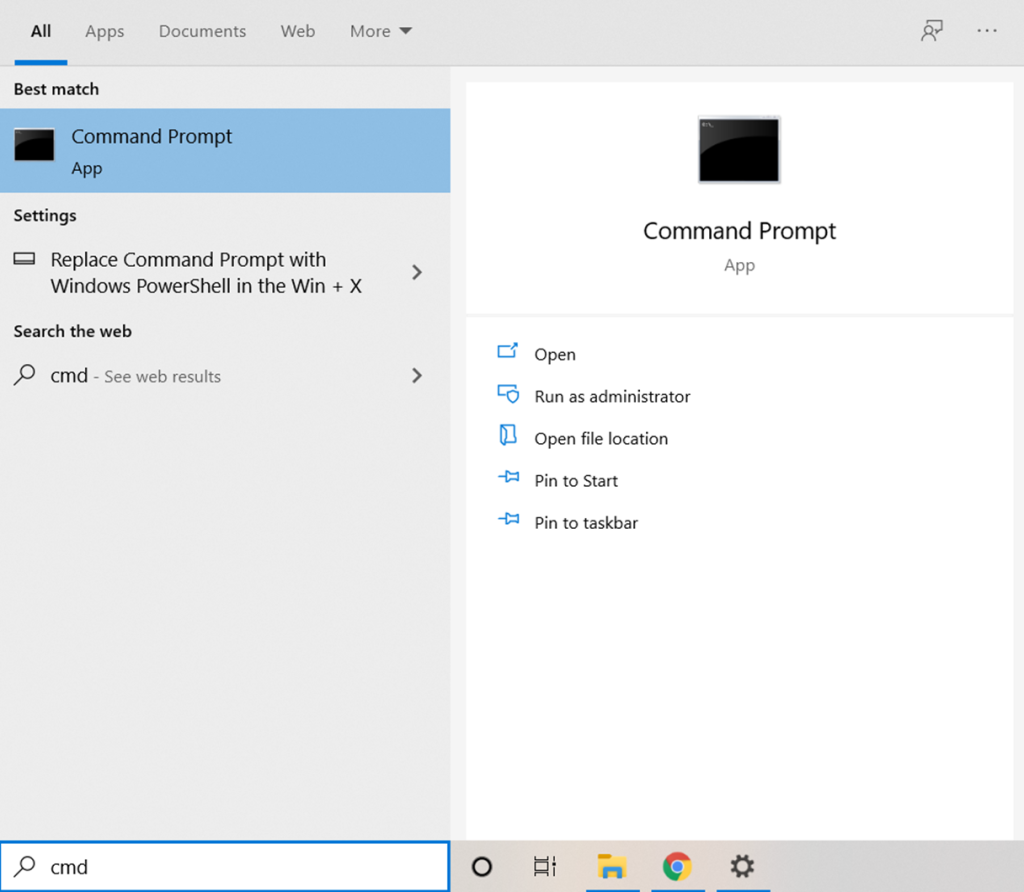
- Run the Command Prompt as an administrator. Simply search CMD in the Start menu and select the option.
2. Now enter the following:
net user Administrator /active:yes
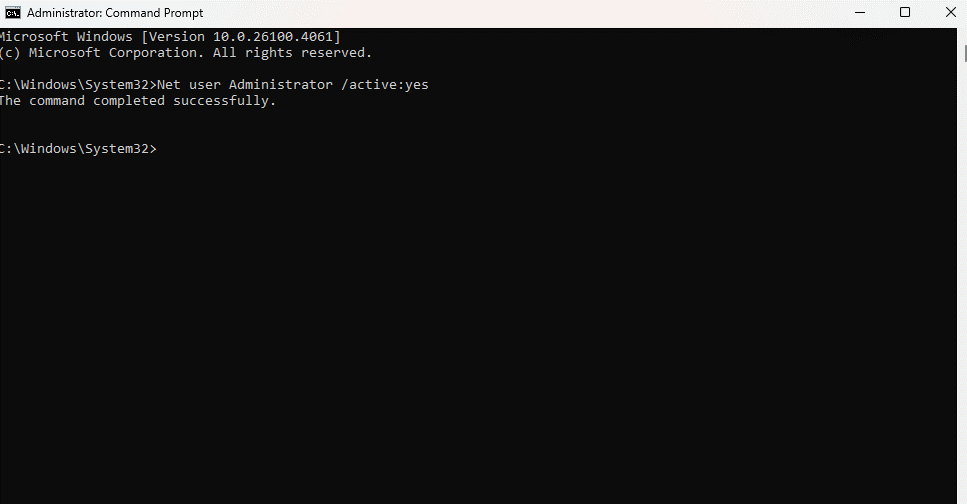
3. You will get a “command executed” message. Try to see if you can access the file now.
#5: Repair Windows with CMD tools
It is also possible that your Windows installation has been corrupted, causing the “Access Denied” error. Don’t worry – you don’t need to reinstall Windows to fix this. Built-in tools like the System File Checker (SFC) can scan your installation and repair any missing or corrupted system files.
But what if the Windows system image itself is corrupted? This is why an SFC scan is usually paired with a DISM command. The command tells Windows to download a fresh system image first from the Windows cloud server, after which it can accurately scan your drive for errors.
Here is the step-by-step process:
- Open the Command Prompt as an administrator. You can search for CMD in the Start Menu to find the option.
2. We will start with a DISM command to get a clean system image. Enter the command:
Dism /Online /Cleanup-Image /RestoreHealth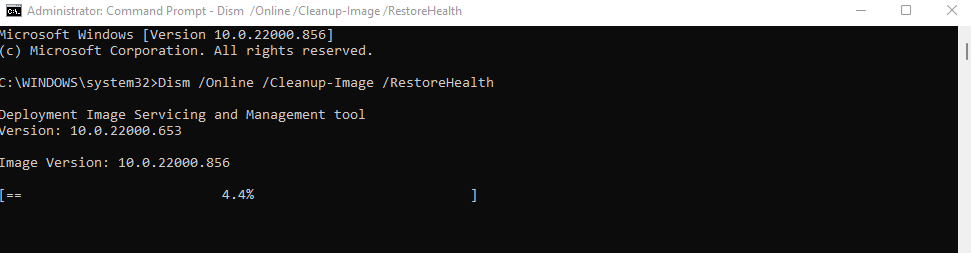
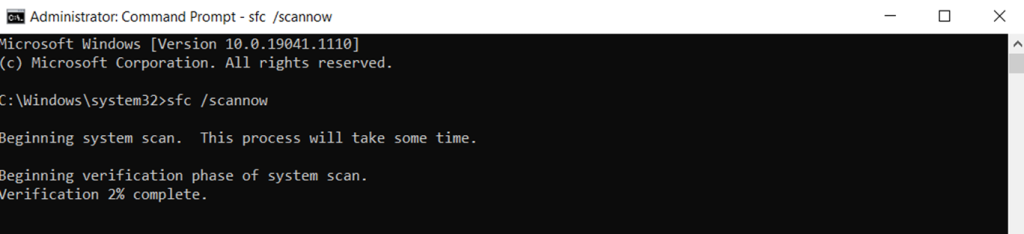
3. Once this process completes, we can start an SFC scan. Enter:
sfc /scannow
4. And that’s it. Wait while the tool scans your system files to find errors. Any corrupted files will be replaced with the healthy system image, fixing all such issues.
#6: Use System Restore
System Restore is a feature meant to reset your PC’s configuration to a past state. The OS automatically creates System Restore points whenever you make major changes to the computer, such as installing a Windows Update.
This means if you suspect the file access issue is due to a faulty Windows Update or a recently installed driver, you can fix it by using System Restore.
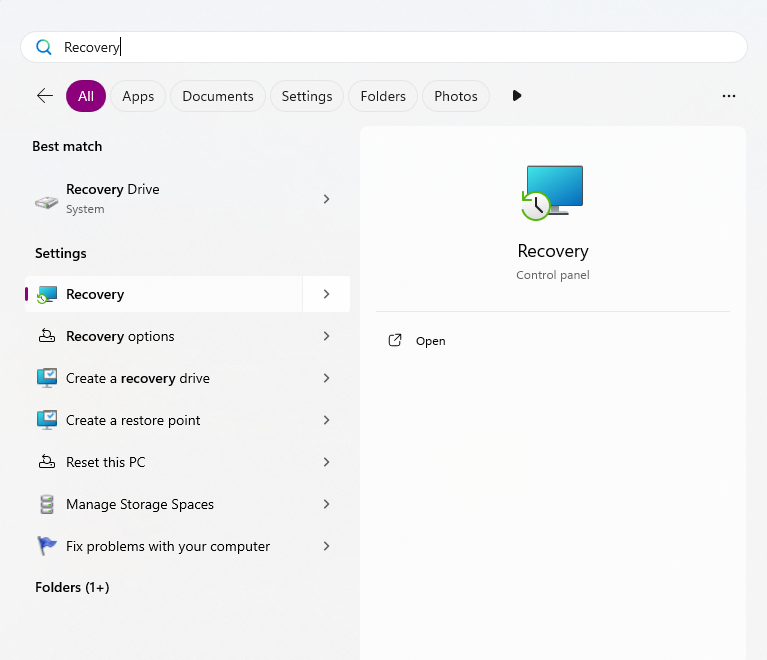
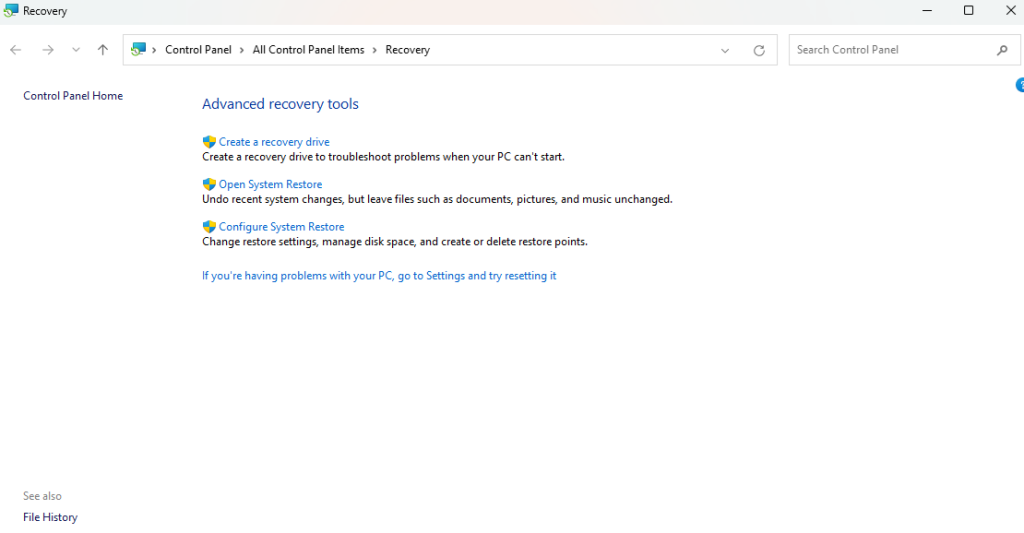
- First, navigate to Control Panel > Recovery. You can also just search “Recovery” in the Start menu to find it.
2. In this window, select the Open System Restore option.
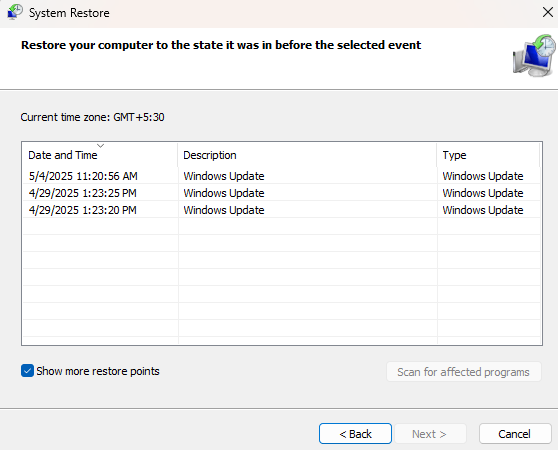
3. Now a new window will open, listing all System Restore points and their creation dates. Select one to revert your settings.
#7: Scan with data recovery software
If no other method so far has worked for you, the only thing left to do is to scan the PC with a data recovery tool. What it does is simple – it goes through the contents of your hard drive, locating each file through its file signature.
A data recovery app isn’t held back by permissions or incorrect accounts either. Since it directly scans the underlying data, it can find even deleted or blocked files, making them available to be restored.
The process is simple: download a data recovery app and scan your hard drive with it. The results will include both deleted files and any other files already on the drive, including the normally inaccessible ones.
Just select the ones you want to keep and restore them to a different location. You will be able to easily access this recovered version of the file.
What is the best way to fix the “Access Denied” error?
At its core, the Access Denied error means that you lack permissions to open the file or folder in question. The issue is figuring out why.
The easiest fix is if it is simply an account issue. You can log in from the correct account, access it as an administrator, or just change that file’s permissions.
When these methods don’t work, the problem runs deeper. Maybe it’s an antivirus blocking access, maybe it’s system file corruption. You can try fixing these individual issues, or just run a data recovery tool to scan and restore the inaccessible files.