


In a nutshell, a partition creates separate, independent sections on a Mac that will serve as storage areas on a physical hard drive. They help organize the data and enable users to manage several operating systems on one device. Irrespective of their purpose, subdividing the drive should adhere to a specific procedure for it to work correctly.
This blog post will provide you with quick guides on creating partitions using Disk Utility and Boot Camp Assistant and explain how to partition an external hard drive on a Mac.
How to Partition a Mac Internal Hard Drive:
Let’s start with partitioning the internal hard drive on your Mac using built-in tools provided by macOS.
1. How to Partition a Mac Internal Hard Drive with Disk Utility
As a Mac user, you have likely used Disk Utility to manage external and internal drives. This built-in macOS tool has a graphic interface that is simple and intuitive, and often makes disk partitioning easy to understand. Of course, using this tool does carry the risk of data loss associated with partitioning, so make sure to back up all of your data that is on the disk before you partition it.
To create a partition using Disk Utility:
- Open Spotlight search and type Disk Utility to access the tool.
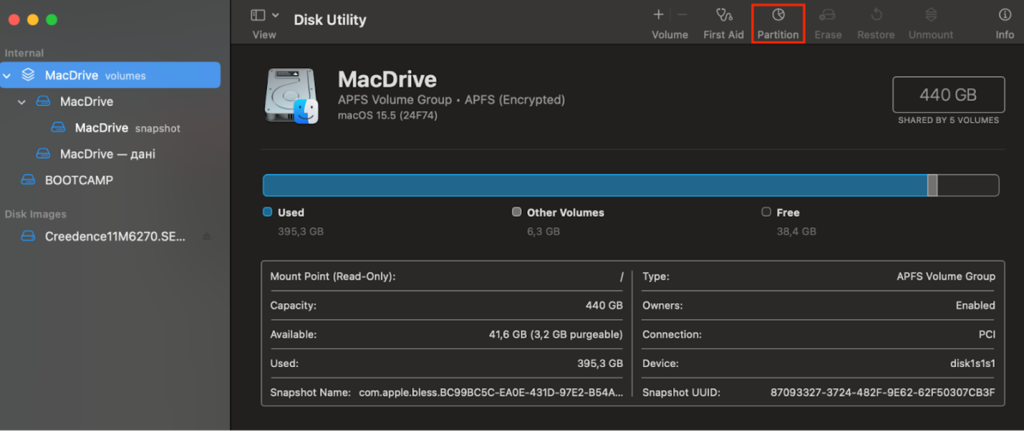
- You can see the list of volumes your Mac detects on the left side bar.
- Choose the volume you want to manage and click the Partition button in the upper right corner.
- Hit the Add button in the newly appeared window and type in the partition name you are creating.
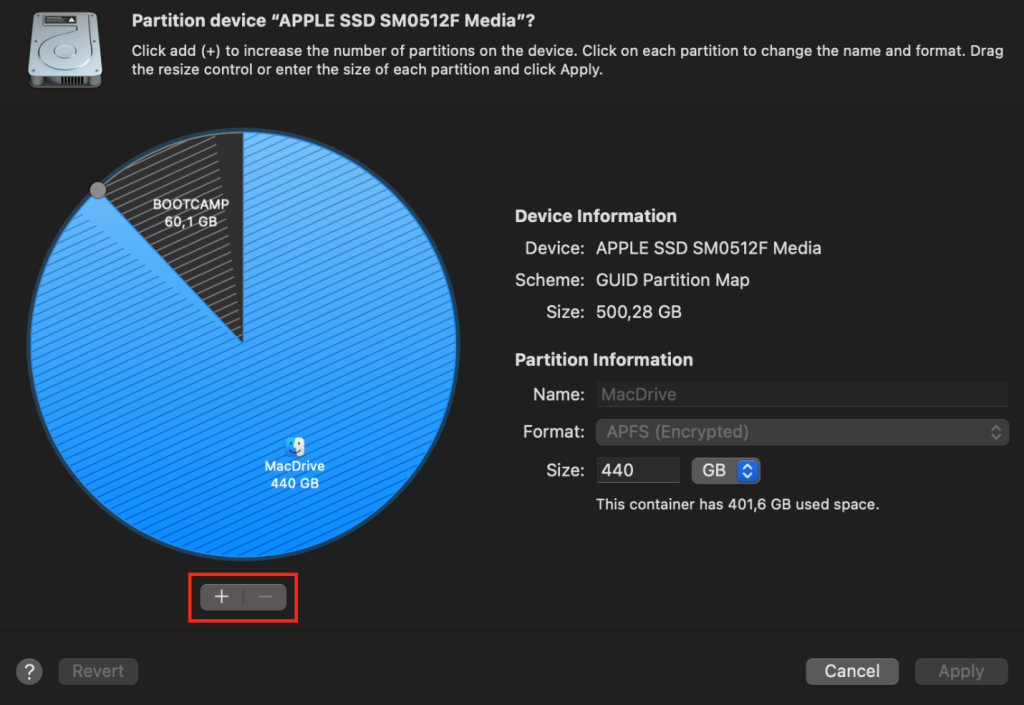
- Choose the appropriate file system format and set up the partition size.
- Hit Apply and Confirm to start partitioning.
2. How to Partition a Mac Internal Hard Drive with Boot Camp Assistant
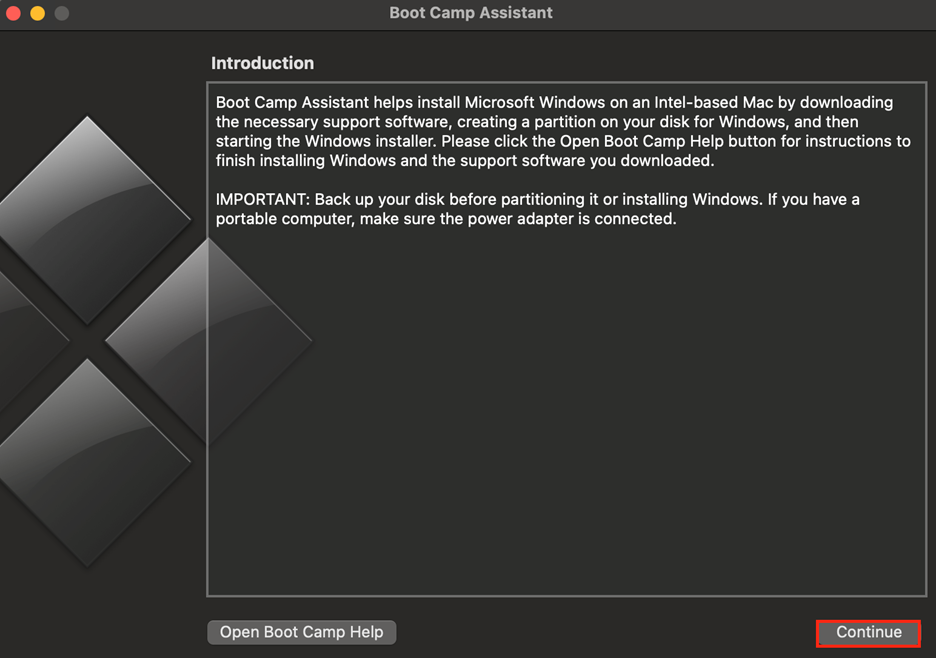
Using the Boot Camp tool allows Mac users to create a new partition on their hard drive to install another operating system. Boot Camp partition is commonly used to install the Windows operating system on a Mac without buying another device. Before creating a partition with a Boot Camp tool, you should ensure your Mac meets specific criteria.
| Update status | Recently updated |
| Storage | 64 GB and more free space |
| Processor | Intel-based |
To create a partition using Boot Camp:
- Access Boot Camp via Spotlight search or Finder > Applications > Utilities.
- Connect an external hard drive to your Mac (for older Macs of pre-2015 models).
- Set a correct partition size to meet storage-space requirements.
- Start partitioning.
- When Boot Camp Assistant finishes partitioning, restart your Mac.
Pro tip: Older Mac models require you to create a bootable USB drive to proceed with partitioning via Boot Camp Assistant. The drive should contain a minimum of 16 GB of space. Newer Intel-based models, however, can install Windows directly from the ISO kept on your internal drive.
3. How to Partition an External Hard Drive on a Mac
The need to partition an external drive often arises when a user has to share large portions of data between multiple devices, and some of these devices work with the Windows operating system. The solution to this problem is partitioning an SSD to hold data for both operating systems.
How to partition an external SSD Mac:
- Open Disk Utility and select the external drive you want to partition.
- Select Erase and set the name and the ExFAT file format.
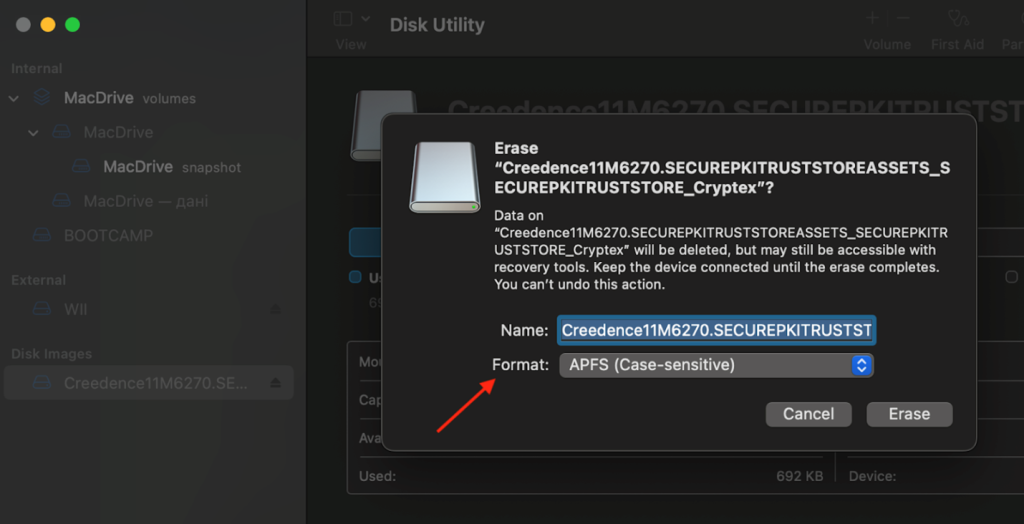
- Finish erasing the drive and move to partitioning.
- Click on the external drive again and choose Partition from the top toolbar.
- Set partition sizes and select ExFAT file format again.
- Click on Apply to start creating a new partition.
Why Partition a Hard Drive on a Mac?
There is no unified opinion on whether to partition a drive on a Mac computer. Some believe it is better to avoid the process to avoid unintentional data loss and other risks. The APFS file system format allows you to install a different macOS version or access advanced storage options without creating partitions.
Let’s move to the scenarios when disk partitioning is required or preferable.
Cross-Platform Usage
Mac users often partition an external hard drive when using the disk across several devices, including those operating Windows. Creating separate volume segments also makes using different versions of macOS possible. As a result, each operating system functions separately and has its own settings, apps installed, and even system files.
Organizing the Disk
Suppose you store all your files on one drive: personal photos, professional documents, videos, backups, and more. It can become chaotic, and you may struggle to find a needed file. Partitioning can help you save the day by offering separate spaces to store each data type.
Improve Data Security
Usually, if one partition goes bad, the others will be fine. So, if you have malware on one partition, you can quarantine and contain it to that partition while keeping the rest of your data clean/fine. You can also dedicate a single partition for your backups, which will both increase the safety of the backups and lessen the likelihood of file corruption.
Bonus: How to Choose the Correct File Format to Create Partitions on a Mac
When you use a Mac to partition an external hard drive, you’ll have the choice of several formats for future partitions. Different formats work best for other purposes, so the choice mainly depends on why you partition the drive. You should also be aware of the potential software limitations of the macOS version.
We offer a brief overview of frequently used formats and when each file type is more suitable.
| Apple File System (APFS) | macOS 10.13 High Sierra and later |
| MacOS Extended (HFS+) | older macOS versions, before High Sierra |
| ExFAT | cross-platform use and sharing large files |
Bottom Line: Should I Partition the Drive on a Mac?
Partitioning drives on a Mac serves different purposes and is often used to organize the data or install other operating systems on one device. Depending on the purpose and the drive type, you can create partitions on a Mac through the Disk Utility or Boot Camp Assistant. No matter which way you work with, remember to keep any pre-existing data safe, as partitioning involves data erasure.