


Ever been stranded with a PC that just won’t roll back? System Restore is supposed to be your digital safety net, but it can leave you high and dry when it fails. Whether you’re on Windows 10 or 11, hitting a “restore point failed” error can be as frustrating as your Wi-Fi dropping during the best part of a movie. Windows users rely on restore points all the time when things go sideways, but when this feature refuses to work, it feels like all hope is lost.
Okay. Enough with the nightmares! Let’s explore the common reasons why System Restore might not be working for you, and dive into some of those common practical fixes you can try. In most cases, they’ll get your restore feature working again or at least help you recover your system’s data. Let’s get your PC back on track!
Why System Restore May Fail
It’s important to first know the known troublemakers that might have caused this error:
- Malware, Updates, or Installs
- Corrupted Restore Points
- Disabled Protection or Low Disk Space
- Disabled System Services
- Corrupt System Files
These issues can affect both Windows 10 and 11 alike. Let’s look at how to fix them.
Methods to Fix System Restore
Now, let’s walk through five fixes. After trying each of the methods listed below, attempt to run System Restore again to see if it resolves the issue. Always remember that you are using your administrator account when trying out these methods. Alright, let’s get going.
Method 1: Try a Different Restore Point
Windows often creates multiple restore points over time, so you have options. If your chosen point failed, just pick an alternate one.
- Open System Restore by pressing Windows key and R key together, typing rstrui and pressing Enter. If you can’t see it, go ahead and search “System Restore” in the Start menu. You’ll find it in the results.
- Now,it’s time to choose a different point. In the wizard, have a close look at the list of restore points. They are the ones that have dates and descriptions. Once you have zeroed in on which restore point you’re going with, select it. Remember that it should be from before the time you started encountering the problem.
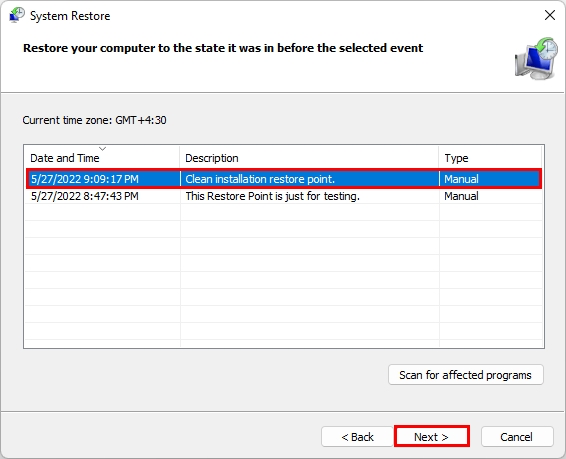
- After the selection,click Next and finish the wizard. Your PC will restart during this process and apply the restore point after that.
If the original restore point was corrupted, you can use another one, preferably an earlier one, to solve the problem. After the reboot, your system should be back to the state of the chosen restore time. If System Restore still fails, move on to the next fix.
Method 2: Run System Restore in Safe Mode
Sometimes, your antivirus software or other apps interfere with System Restore. But when you are booting into Safe Mode, it loads only core Windows services and gives you a cleaner system. Here’s how you can go about it:
- Enter Safe Mode by following this series of actions: Settings > Update & Security > Recovery > Advanced startup.
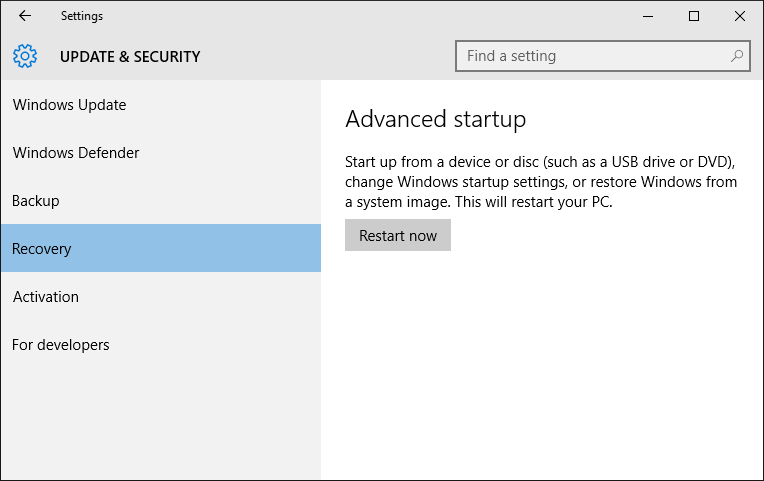
- On this page, click Restart now.
- Now in the blue menu, you’ll have to go to Troubleshoot > Advanced Options > Startup Settings > Restart.
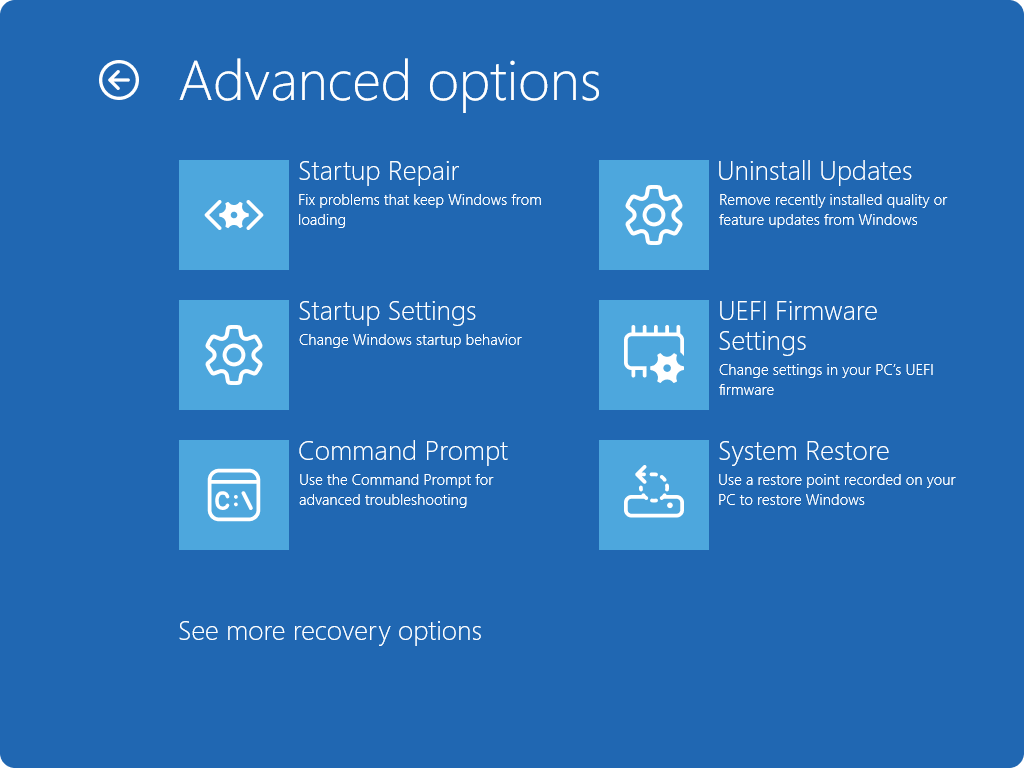
- While restarting, press 4 or F4 for Safe Mode.
- When you see that Windows is running in Safe Mode, go to System Restore by searching in the Start menu (like we did in Method 1).
- Here, pick a restore point and proceed as usual.
Safe Mode normally can sidestep various conflicts in a PC. If System Restore works using the above-mentioned steps, reboot normally and your system will stay fixed. If it still fails, try the next solution.
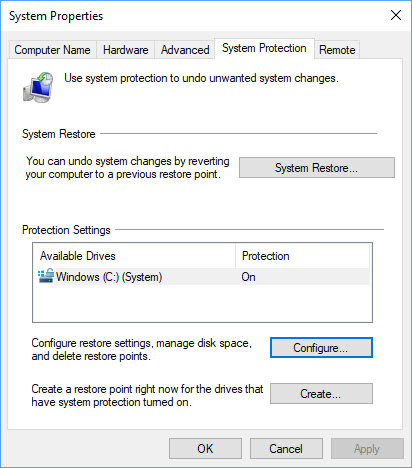
Method 3: Check System Protection and Disk Allocation
System Restore will majorly fail to work if protection is off or your disk usage is maxed out. Here’s how you fix these settings:
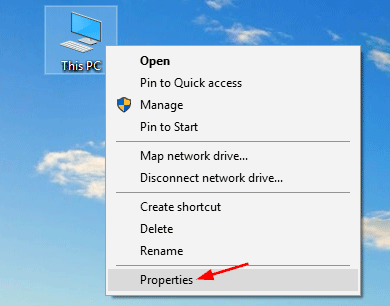
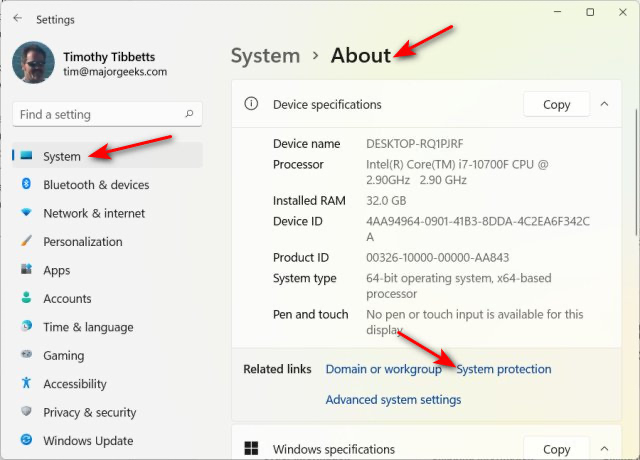
- Open Protection Settings. To do this, right-click This PC (or Computer on older versions) and choose Properties.
- Click System Protection on the screen.
- In the System Protection tab, select your system drive (e.g. C:) and click Configure.
- On this page, ensure that the Turn on system protection option is selected.
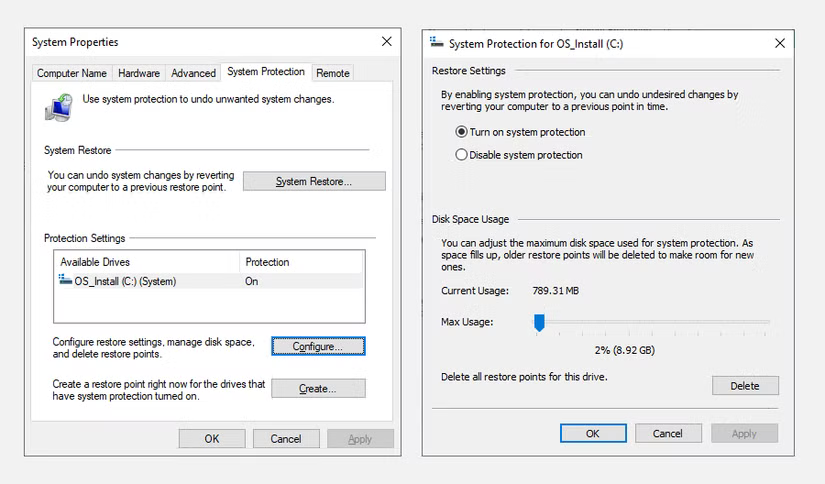
- Now, drag the Max Usage slider higher. On normal days, 5 to10% of the drive is a good start but you can proceed by setting a larger GB value (e.g. 4GB or more) as well.
- Click Apply and OK.
Allocating more space guarantees that Windows can save multiple restore points. With protection enabled and enough quota, try System Restore again. This often fixes failures caused by insufficient disk allocation.
Method 4: Verify Volume Shadow Copy Service
System Restore relies on the Volume Shadow Copy service (VSS). Therefore, it is crucial to ensure it’s running fine. To ensure, we have the following steps for you:
- Open Services by pressing Windows key and R key together (Run dialog box), then typing services.msc, and hitting Enter.
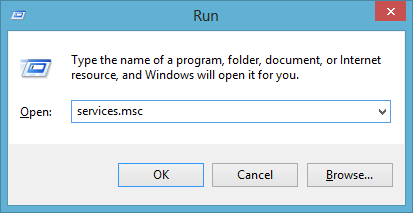
- Now, enable VSS. This can be done by finding Volume Shadow Copy in the list. When found, double-click on it and set the Startup type to Automatic. If it’s stopped, click Start. Do the same for Microsoft Software Shadow Copy Provider.
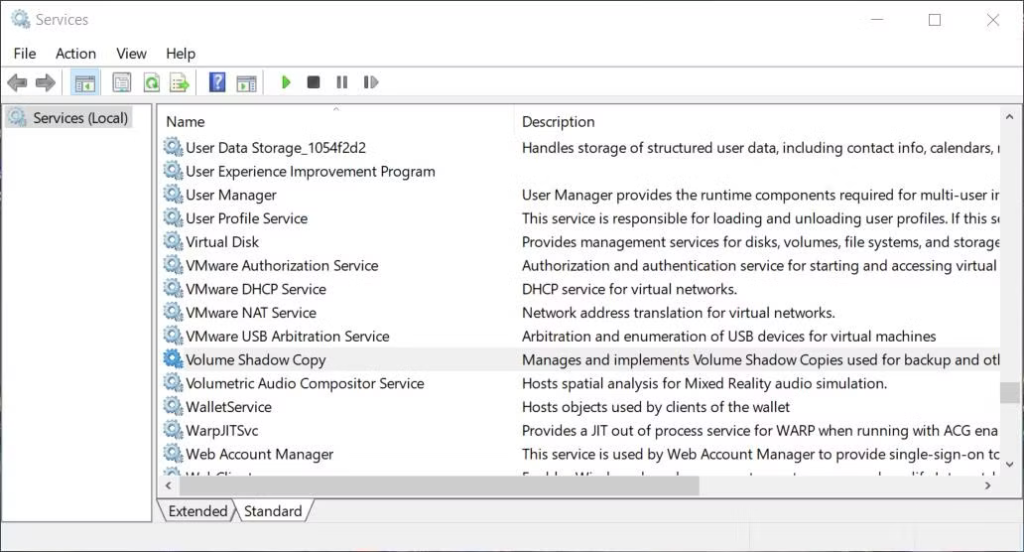
- When you’re done with the aforementioned steps,click OK, close Services, and restart your PC.
With these services running, Windows can create and manage restore snapshots. Now run System Restore again. Getting VSS and related services working often lets the process finish normally.
Method 5: Repair Windows System Files (SFC/DISM)
If restore still fails, file corruption might be the culprit. Windows System File Checker (SFC) is the ideal tool to detect and repair these files. Use these built-in repair tools through following instructions:
- To open Admin Command Prompt, press Windows + X and select Terminal (Admin) or Command Prompt (Admin).
- Type sfc /scannow and press Enter to get the SFC running. Let System File Checker scan and repair files. We know this process can tire you out but this scan and repair usually takes 10–20 minutes to finish. So, you can go for your usual coffee run if you want (not kidding).
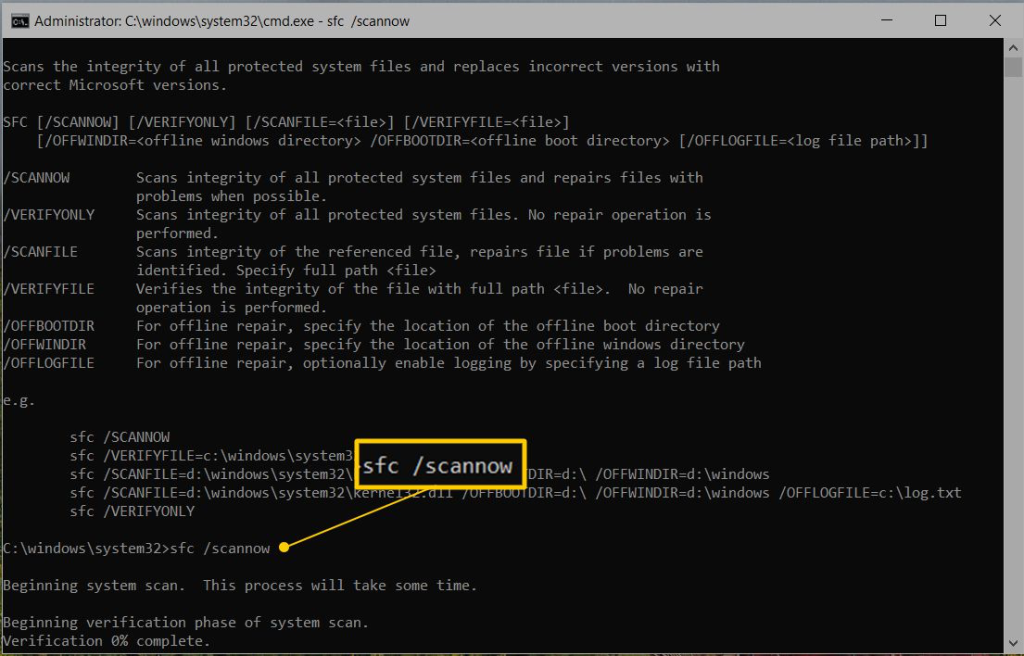
- After these tools finish, restart your PC. Then try System Restore one more time. Repairing corrupt files often resolves the problem, allowing the restore to complete.
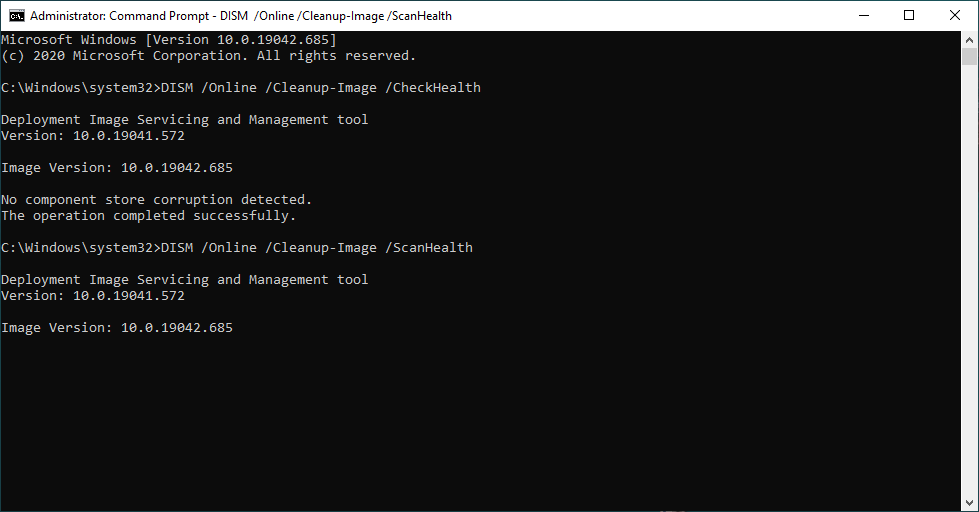
Note: You can also run DISM if these issues persist. This can be done by typing dism /online /cleanup-image /restorehealth in the Admin Command Prompt. This uses Windows Update to replace damaged files.
If System Restore still refuses to cooperate and important files disappear, consider a Plan B: data recovery software. A well-regarded Best Free Data Recovery Software can scan your drives for deleted or lost documents, photos and more. The free edition of such a tool lets you recover up to 1GB of data at no charge, which often covers many of the files you care about. If that isn’t enough, you should consider upgrading to a premium version. It can remove this cap and provide you with additional recovery powers. These programs are user-friendly and compatible with Windows 10/11, giving you a second chance to retrieve any files that System Restore couldn’t salvage.
Conclusion
System Restore is meant to be a dependable safety net, but like any other Windows tool, it can fail at any moment. In most cases, one of the above methods will definitely fix the issue and get your PC backups running again. Remember one thing… always keep your System Protection enabled, and don’t forget to give it ample disk space to create those backups. If the worst happens and these methods we listed don’t work for you, having a good recovery tool means you still have a way to salvage your data if you have lost or corrupted it. With these steps in hand and us by your side (always and forever… Promise!), you’ll be much better prepared when Windows decides to throw a curveball.