


The process of installing Windows on a Mac becomes essential when you want to run software or games that are available only for this operating system. You can uninstall Windows from your Mac if you no longer need it, want to free up disk space, or if Windows interferes with the performance of your Mac. To prevent data loss and ensure your device works properly, find out how to delete Windows from Mac correctly.
Check How the Windows was Installed in Your System
There are two ways to remove Windows from a Mac. It depends on whether the system was installed via Boot Camp or a virtual machine. Installing Windows via Boot Camp Assistant is only possible on Mac computers with Intel processors that were used in MacBooks until the end of 2020. If you have a new model with an ARM architecture processor (M1, M2, M3), Windows was definitely installed via a virtual machine, and you can skip part A about Boot Camp and go to part B.
Check if Windows was installed via Boot Camp
Step 1. Check if Boot Camp Assistant is installed
- Open Finder.
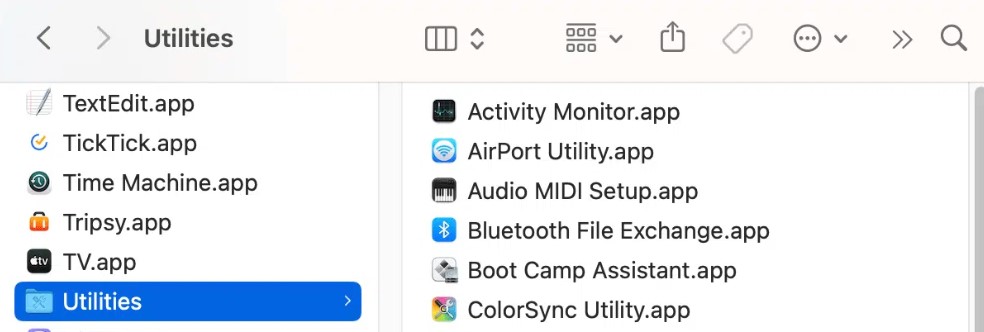
- Go to Applications > Utilities.
- Find Boot Camp Assistant.
If the program exists, then Windows was probably installed through it, but this is not a guarantee.
Step 2. See if there is a BOOTCAMP disk
- Open Finder.
- View the list of disks.
- The presence of a BOOTCAMP partition on your disk indicates that you installed Windows through Boot Camp Assistant.
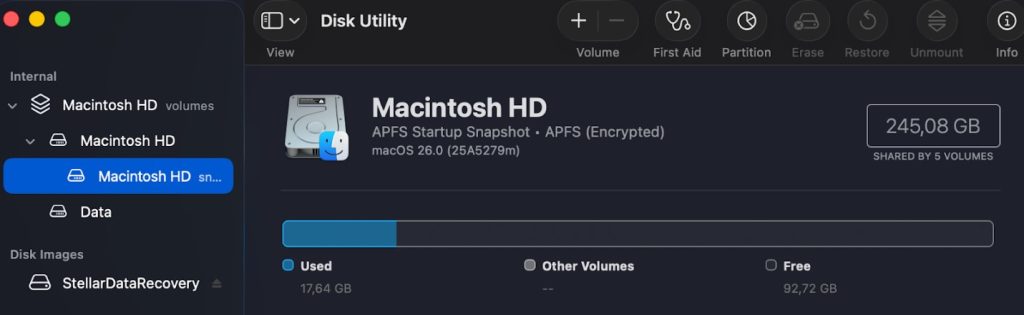
Step 3. Check the disk using Disk Utility
- Open Applications > Utilities > Disk Utility.
- Find the main physical disk (often called “APPLE SSD” or “Fusion Drive”).
- Expand the list of partitions below it.
- The presence of a BOOTCAMP partition or NTFS file format indicates that Windows was installed through Boot Camp. NTFS represents the standard Windows file system, which macOS does not utilize.
Check if the system selection menu appears when you start your Mac
- Turn off your Mac.
- Turn it on while holding down the Option key.
- Wait a few seconds – a menu with a selection of disks to boot from will appear.
If you see two options – Macintosh HD and BOOTCAMP – this confirms that Windows is installed via Boot Camp. If only one starts up, it is either macOS or a virtual machine.
Check if Windows was installed via a Virtual Machine
- Remember how you work with Windows
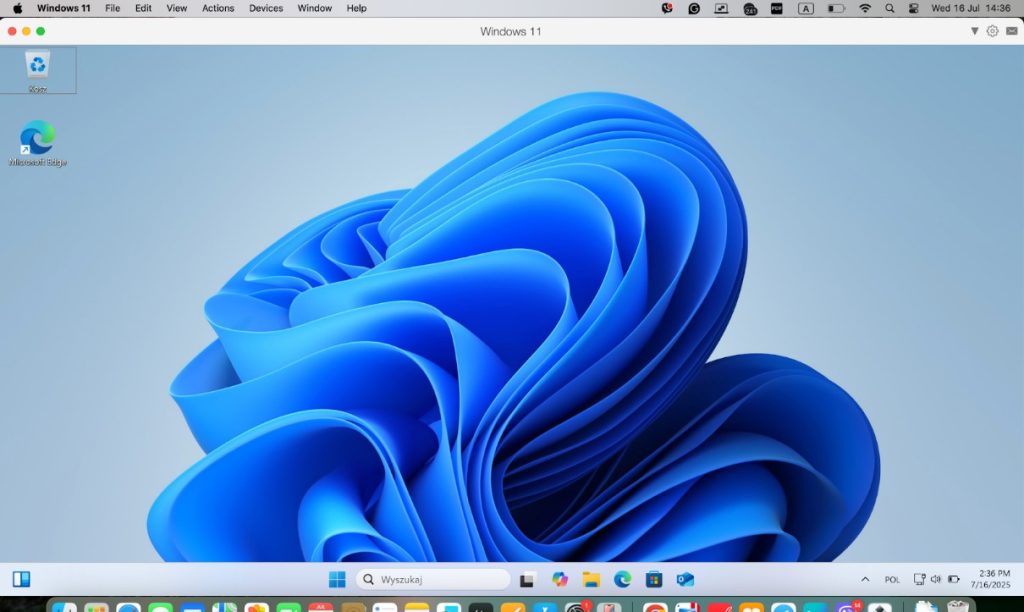
If Windows OS opens in a separate window and runs parallel to macOS, then it is installed via a virtual machine.
2. Find the virtualization program
- Open Finder.
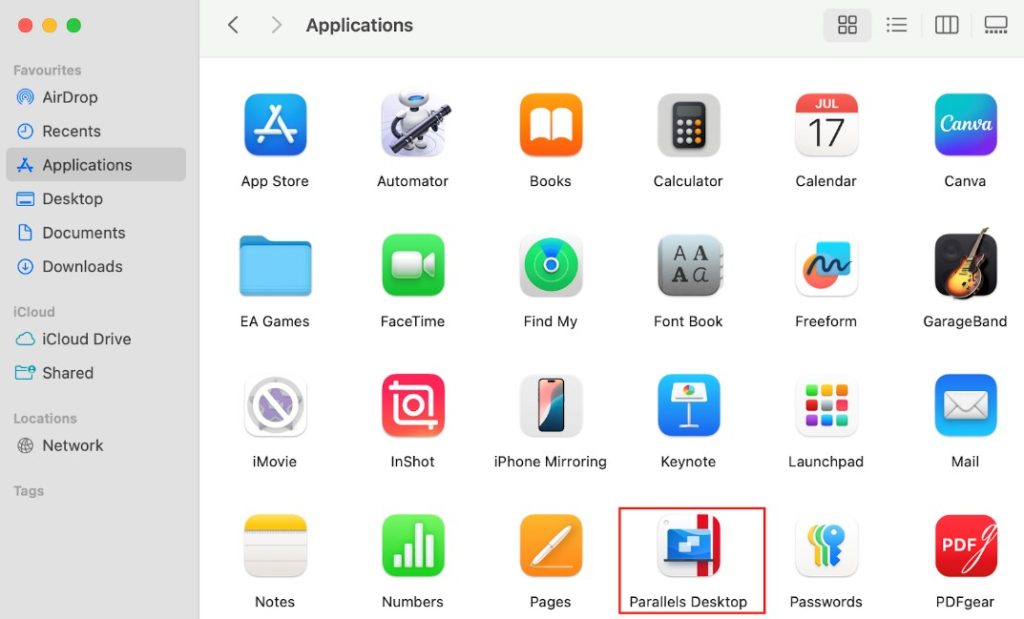
- Go to Applications.
- In this Applications folder, look for any of the following installed: Parallels Desktop, VMware Fusion, or VirtualBox.
If you see one of them, then this means that Windows is installed through it.
3. Find the virtual machine file
- Open Finder.
- Go to Documents.
- Look for the folder: Parallels/Virtual Machines/VMware. If there is no folder, use search to find it.
- Inside, there should be files with the extension:
- pvm for Parallels
- .vmwarevm for VMware
- .vbox or .vdi for VirtualBox
This is a container that stores the entire virtual machine.
Now that you know how Windows was installed on your MacBook, follow the removal guide below.
Part A: How to Delete Windows from a Mac Using Boot Camp Assistant
Important! Before you start removing Windows from your Mac, you need to back up your data. When you remove Boot Camp, all data stored in this environment will be deleted. Follow these steps to save important information:
- Boot into Windows. Start your Mac computer while keeping the Option key pressed and choose Windows from the boot options.
- Connect an external storage device.
- Copy important files:
- documents, photos, work files
- passwords from your browser or key files (if necessary)
- folders with work software, if saving settings is critical.
4. Check the backup.
Insert the media into your Mac and make sure all files open. After that, you can start the Windows uninstall.
Steps to uninstall Windows from a Mac via Boot Camp:
- Open Boot Camp Assistant
Open Finder > Applications > Utilities. Find and open Boot Camp Assistant.
- Select the option to remove Windows
Boot Camp Assistant will automatically detect that Windows is installed.
You will see the option “Remove Windows 10 or later version” or a similar option. Click Continue.
- Restore the disk
Boot Camp Assistant will:
- Remove the Boot Camp partition where Windows was installed.
- Merge this space with the main macOS disk.
This process is automatic — you don’t need to do anything manually through Disk Utility.
General Troubleshooting If You Cannot Uninstall Windows from Mac Using Boot Camp Assistant
Problems that can appear when uninstalling Windows from a Mac:
- Boot Camp Assistant shows an error that prevents you from deleting the partition.
- The Boot Camp partition remains inaccessible in Disk Utility and cannot be deleted.
- The disk does not merge automatically.
Manual deletion via Disk Utility
Do this if you are sure that the partition you are deleting is the Windows partition. Otherwise, you may accidentally erase macOS.
Follow the instructions below:
- Open Disk Utility: Applications > Utilities > Disk Utility
- In the top menu, click View > Show All Devices.
- Find a partition named BOOTCAMP or Untitled – it is usually formatted in NTFS (Windows file system).
- Select this partition and click “Erase” or “Delete Volume.”
- Then merge the space with the main macOS partition:
- Select the main disk (usually Macintosh HD Container)
- Click “Partition” or “Resize” – extend the main partition to the entire available space.
How to Merge Unallocated Space Back to macOS
If the disk space did not merge automatically after removing Windows, you need to do it manually by following these instructions:
- Open Disk Utility.
Press Command + Space > Enter Disk Utility > Open.
- Switch to view all devices
In the upper-left corner of the window, click View > Show All Devices – this is important!
- Find the main disk
It is usually called Apple SSD or Fusion Drive. Under it, you will see the Macintosh HD partition (or whatever you named it). It may be Free Space/Not Allocated (gray).
- Merge the space
Right-click (or use two fingers on the trackpad) on Macintosh HD and select “Expand Volume” (Expand Volume / Resize Volume).
Part B: How to Remove Windows from a Mac Installed via a Virtual Machine
A virtual machine is a program that is opened via the control panel. It requires the resources of a physical device to function. Using a virtual machine, you can run two operating systems simultaneously. Windows opens as a separate window within the virtual machine software.
The three most popular virtual machines for running Windows on Mac are Parallels Desktop, VMware, and VirtualBox. Before removing these programs, always back up your data. In this case, you can use Time Machine:
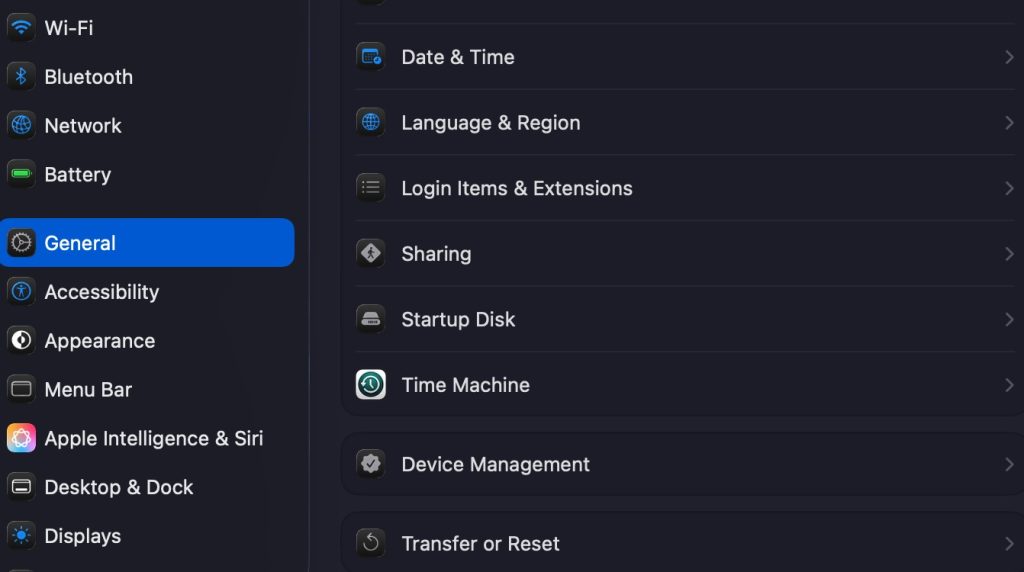
- Open System Settings > General > Time Machine.
- Connect an external drive and add it as your Time Machine backup disk.
- After adding, back up your data on it.
- Now, you can start removing Windows from your Mac. Let’s see how to uninstall Windows on a Mac step by step.
For Parallels Desktop
- Open Finder > Documents > folder Parallels. Open this folder and find the file with the .pvm extension. Usually, it is named Windows.pvm. Delete this file and clear the bin.
- If you don’t need the Parallels Desktop application, delete it too.
For VMware Fusion
- Open Finder > Documents > folder VMware Fusion. Open this folder and find the file with .vmwarevm – for example, Windows 10.vmwarevm. Delete this file and clear the bin.
- If you don’t need VMware Fusion, move it to the bin and clear it.
For VirtualBox
- Open Finder > Documents > VirtualBox VMs. Open this folder and find the folder that contains your virtual machine. It usually has a name like Windows or Windows 10.
- Inside, look for files with extensions like .vbox and .vdi – these are your virtual machine’s configuration and disk image files.
- Delete the entire virtual machine folder, then empty the Trash.
Post-Removal Cleanup
- Check for remaining files. The ~/Documents, ~/Downloads, and ~/Library folders may contain files that remain after uninstalling Windows. Be aware of large virtual machine files, installation images, and temporary data.
- Empty the Trash. Files moved to the trash continue to take up disk space until the trash is emptied.
- Restart your Mac. This will help the system correctly display the updated amount of free space.
- Check the disk status. To do this, open Disk Utility (via Applications > Utilities > Disk Utility), select the system disk, and click First Aid to check the disk for errors.
- Check the amount of available space. In Disk Utility or in the About This Mac Storage menu, you can see how much free space is now available.
Conclusion
We reviewed two methods for installing and removing Windows on a Mac – through Boot Camp and using a virtual machine. Boot Camp is suitable for MacBooks produced not later than 2020. Virtual machines are easier to manage but require more disk space and resources. Always remember to back up the data from your PC before uninstalling Windows OS.
FAQs
If you have some more questions, you can find the answers below.
Yes, it will free some storage space. It can help speed up the work of the MacBook.
You can install Windows later through Boot Camp or virtual machine technology.
The most effective method to remove the BOOTCAMP partition is through Boot Camp Assistant. But you can also do it manually using the instructions above.