


Apple has consistently supported accessibility through device features that enable universal usability. The accessibility features of macOS Tahoe assist users with disabilities while also enhancing productivity, focusing attention, and improving Mac interaction methods.
The Mac Magnifier tool allows users to zoom in on small details, while the Accessibility Reader simplifies webpage content, and the VoiceOver and Braille tools help users navigate their Mac more efficiently. The accessibility features in macOS Tahoe provide benefits to all users who work, study, design, or simply browse the internet.
Why Accessibility Features Matter for All Users
The tools designed for accessibility serve two purposes because they provide additional functionality for power users beyond their intended disability support. The following features assist all users in their daily activities.
- Voice Control and Dictation enable users to perform typing-free page entry and command execution, which saves time.
- The Accessibility Reader tool simplifies website interfaces by removing unnecessary elements, allowing users to focus on reading the content.
- The Magnifier on Mac enables users to enlarge small user interface components, photos, and detailed designs while preserving their display settings.
- The combination of Color Filters and contrast tools with personalized audio settings provides eye comfort during extended work periods and improves both call and music clarity.
- VoiceOver and Braille serve as alternative navigation tools that enable users to discover content through new methods while helping writers, developers, and designers test their interfaces.
Accessibility features function as tools that provide time-saving benefits, visual improvements, and comfort features that benefit all users.
How to Access All Accessibility Settings in macOS Tahoe
The accessibility features of macOS Tahoe exist in a single central location, which provides users with simple access to customization options.
Here’s how to get there:
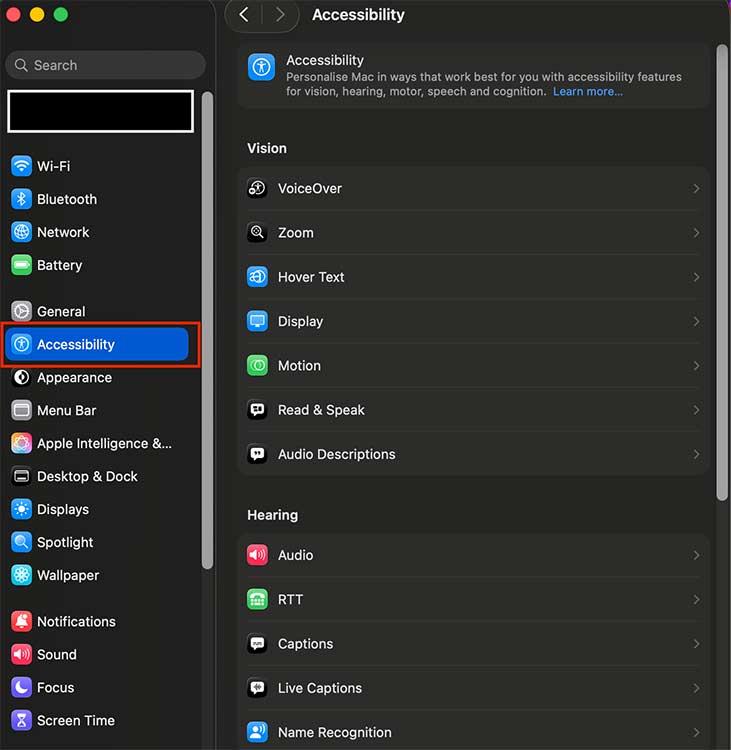
- Open System Settings from the Apple menu.
- Select Accessibility from the list.
- The accessibility features are divided into 5 categories, which are Vision, Motor, Speech, Hearing, and General.
The interface allows users to turn features on or off while enabling customization of settings and creation of shortcuts. Users can access their most used tools through the Control Center or activate them by starting Siri commands with “Turn on VoiceOver”.
5 Essential Features in macOS Tahoe
Every macOS Tahoe user should experience these five essential accessibility features.
1. Magnifier
The macOS Magnifier tool provides users with enhanced viewing capabilities for reading small text in PDFs, complex spreadsheets, and design project details at a closer scale. The Magnifier tool serves users who need precise vision, but it also benefits anyone who wants to enlarge content without modifying their display settings.
How to enable:
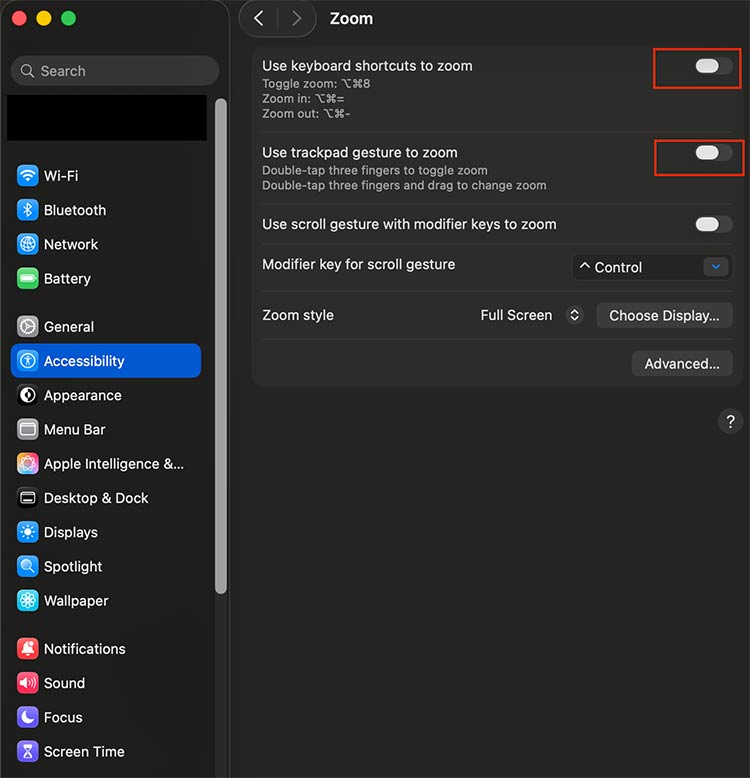
- Open System Settings > Accessibility.
- Under Vision, select Zoom.
- Toggle Zoom on.
- Set needed shortcut (for example, ⌘ + Option + 8 or a three-finger double-tap on a trackpad).
2. Accessibility Reader
The Reader view on Mac removes all unnecessary content from web pages, displaying only the essential text and images. The tool provides optimal reading conditions for both research activities and focused reading sessions, as well as study periods.
How to use:
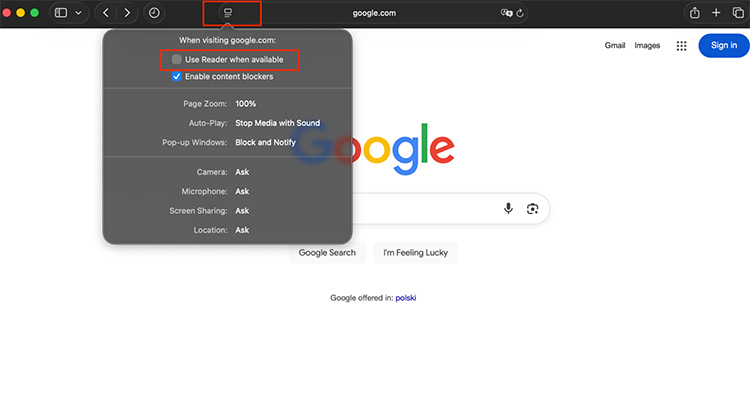
- Open Safari to access any webpage or article you want to read.
- The Reader View button, which appears as four horizontal lines in the address bar, lets users enable Accessibility Reader mode.
- Users can activate Accessibility Reader mode through the Reader View button.
You can personalize the text. Select a font, background color, and adjust the text size for improved visual comfort.
3. VoiceOver & Braille
VoiceOver enables your Mac to speak screen content while allowing screen navigation through voice commands. The tool serves two main purposes: it helps the blind users access their devices while also providing developers and writers a text-to-speech feedback, and anyone who prefers listening to reading. A Braille display enables users to interact with content through touch-based input.
How to enable:
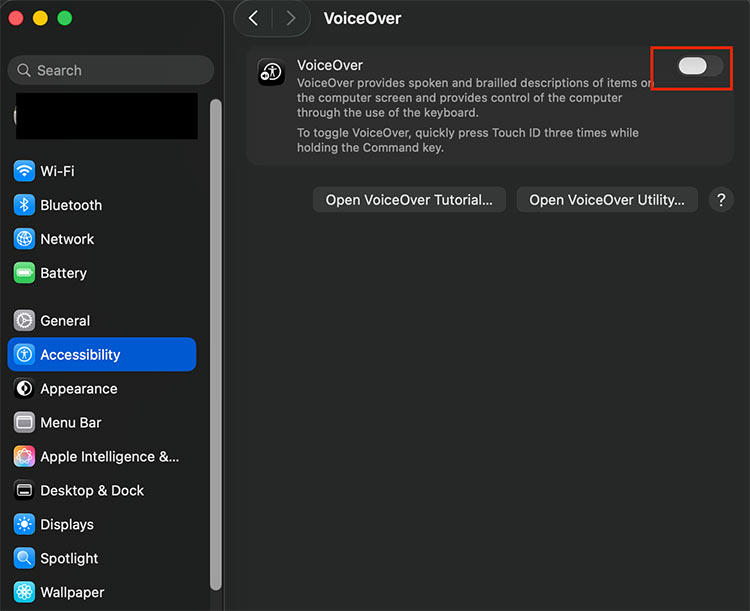
- Go to System Settings > Accessibility.
- Under Vision, choose VoiceOver. The feature becomes active when you press ⌘ + F5.
- To use a Braille display, you need to connect it via Bluetooth, then access Braille settings for setup.
4. Voice Control & Dictation
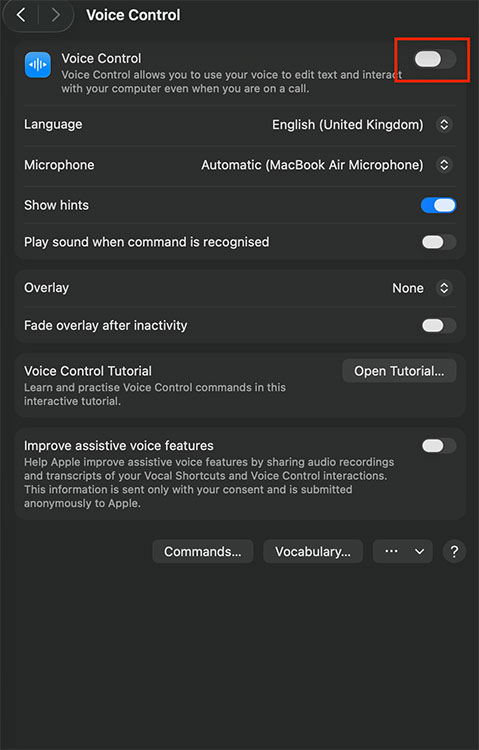
The process of typing becomes inefficient when you need to write content quickly. The Mac operating system allows users to operate their computer through voice commands while composing text without physical keyboard input. Voice Control provides users with a convenient way to multitask and create notes and emails because it removes the requirement for manual typing.
Voice Control activation requires the following steps:
- Open System Settings > Accessibility.
- Under Motor, select Voice Control. The system will ask you to download language files after enabling Voice Control, so proceed with the download.
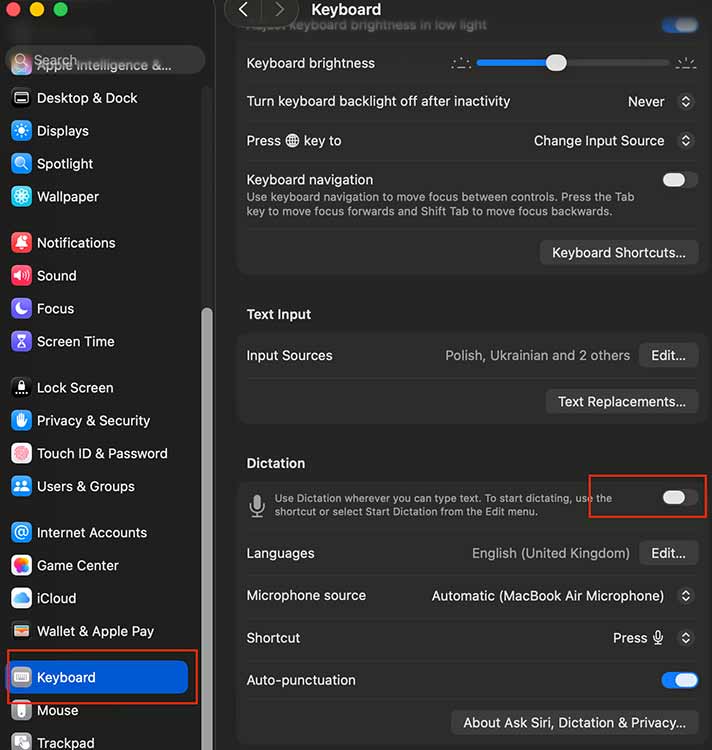
The process to activate Dictation starts with the following steps:
- System Settings contains a Keyboard section where you can find the Dictation option.
- Toggle Dictation on.
- The default shortcut to start dictating text is pressing the Fn key twice.
5. Color Filters & Hearing Accommodations
The way screens display content and audio systems function can cause difficulties for users. The Color filter system decreases eye strain and improves visual contrast. The Hearing Accommodations function enables personalization of AirPods or Beats headphones for improved sound quality. Users can experience better comfort during extended work hours, video calls, or music listening.
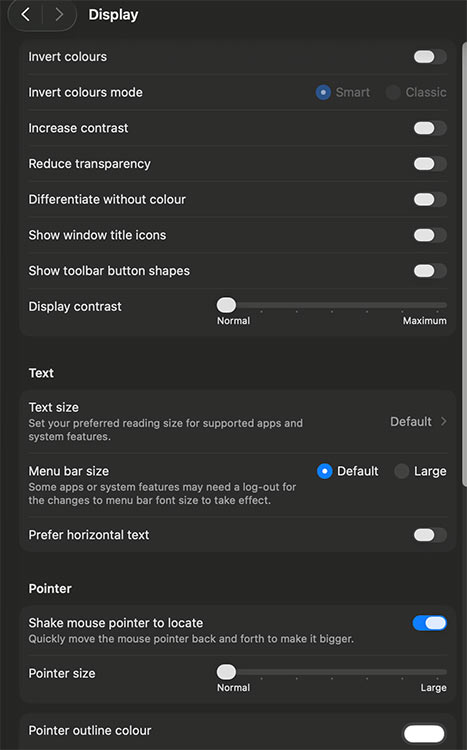
Color Filters activation requires the following steps:
- System Settings > Accessibility section.
- Under Vision, select Display.
- Select your preferred filter from the Color Filters menu after enabling the feature.
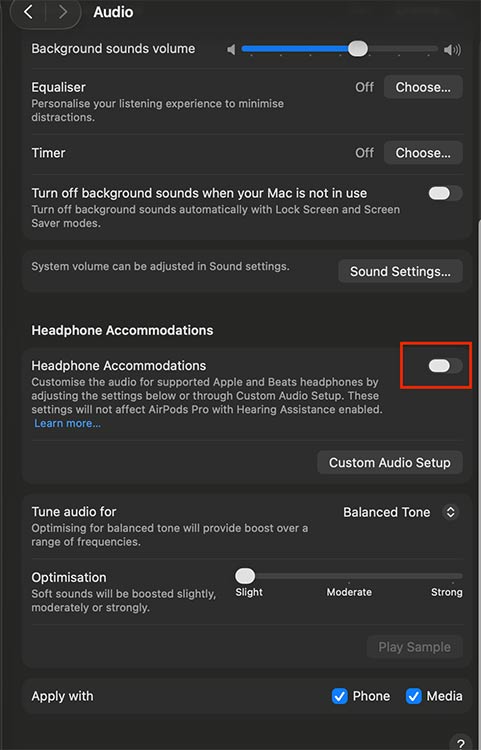
The process to activate Hearing Accommodations begins with headphone connection.
- Connect your AirPods or Beats headphones.
- Open System Settings > Accessibility.
- Under Hearing, select Audio.
- Use the balance controls to adjust tone settings while enabling custom audio amplification.
Hidden Gems Beyond the Big Five
The accessibility features of macOS Tahoe include several useful tools that go beyond the main five options of Magnifier, Accessibility Reader, VoiceOver, Voice Control, and Color Filters.
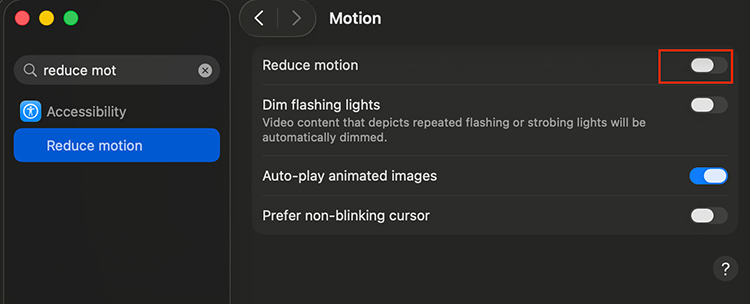
- The Reduce Motion feature reduces screen animations to create a distraction-free interface that provides a smoother user experience. The feature provides users with a faster Mac experience.
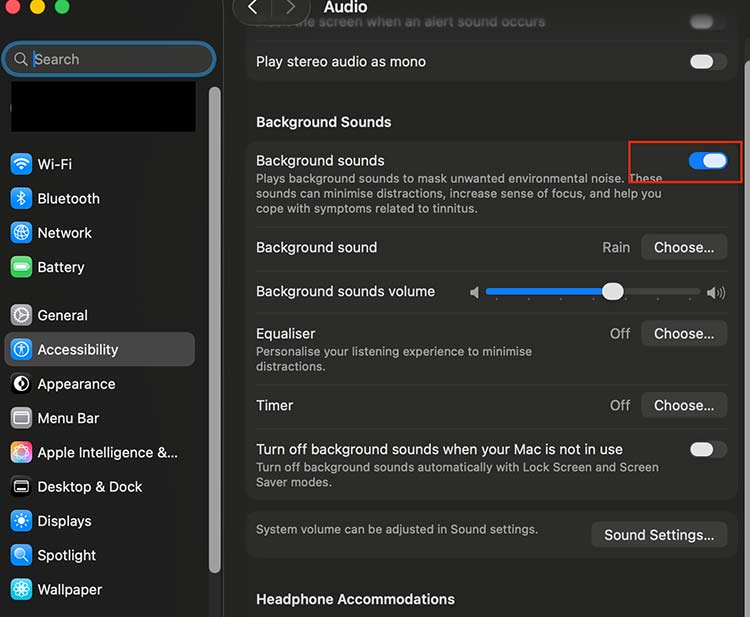
- Background Sounds generates rain and ocean wave sounds, which help users concentrate and relax while working by blocking out distracting noises.
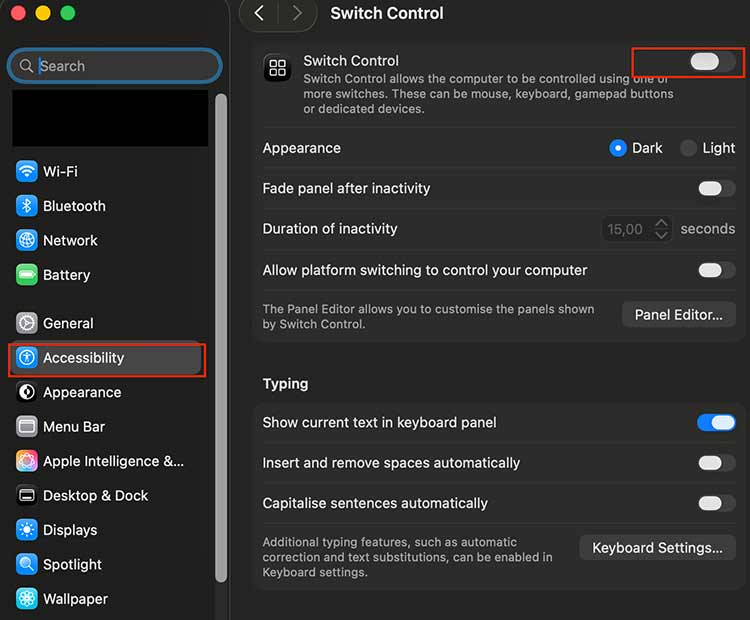
- The Switch Control feature enables Mac control through external devices and single switches, yet proves useful for developing personalized system workflows.
These features serve accessibility needs, but they also enhance focus and decrease tiredness while enabling innovative Mac interface methods.
Conclusion
Accessibility on macOS Tahoe isn’t just about making technology inclusive – it’s about giving every user smarter ways to work, learn, and create. From zooming into details with Mac Magnifier to staying focused with Accessibility Reader or cutting eye strain with Color Filters, these tools are productivity boosters hiding in plain sight.