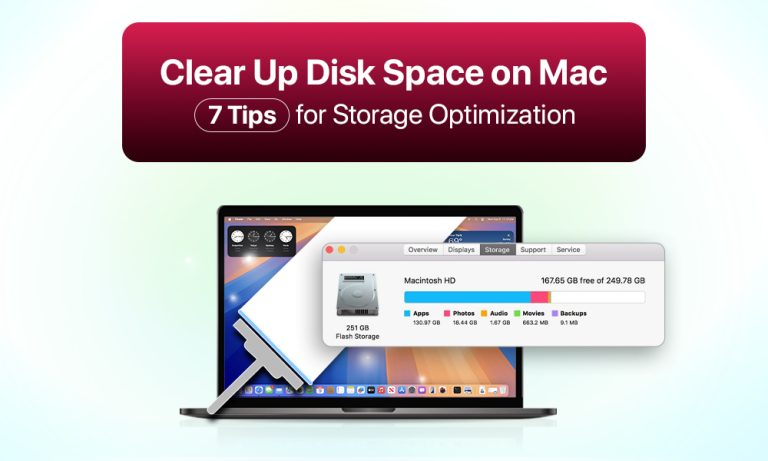
Is your Mac running slow? Does the “Startup Disk Almost Full” warning keep appearing to you? The accumulation of old app files, browser caches, forgotten downloads, and unnecessarily large files can slow down any macOS system, regardless of its original condition. The storage space on your Mac decreases because of hidden junk, which also causes performance slowdowns.
How to Clear Up Disk Space on Your Mac
You can clear up space on a Mac without requiring technical expertise. This guide provides you with the complete information to perform disk cleanup operations safely and effectively.
1. Check Your Storage Usage
Your decision to delete files needs to be made after you understand the sources of space consumption on your Mac. Knowing the specific locations of storage clutter allows you to optimize your cleanup approach and boost overall efficiency.
How to Access Storage Management
Storage Management provides a straightforward interface to view the storage distribution on your Mac. Follow these steps to enter this tool:
- Enter the System Settings by pressing the black Apple button in the top-left corner.
- Select General.
- Select Storage Settings from the window that opens.
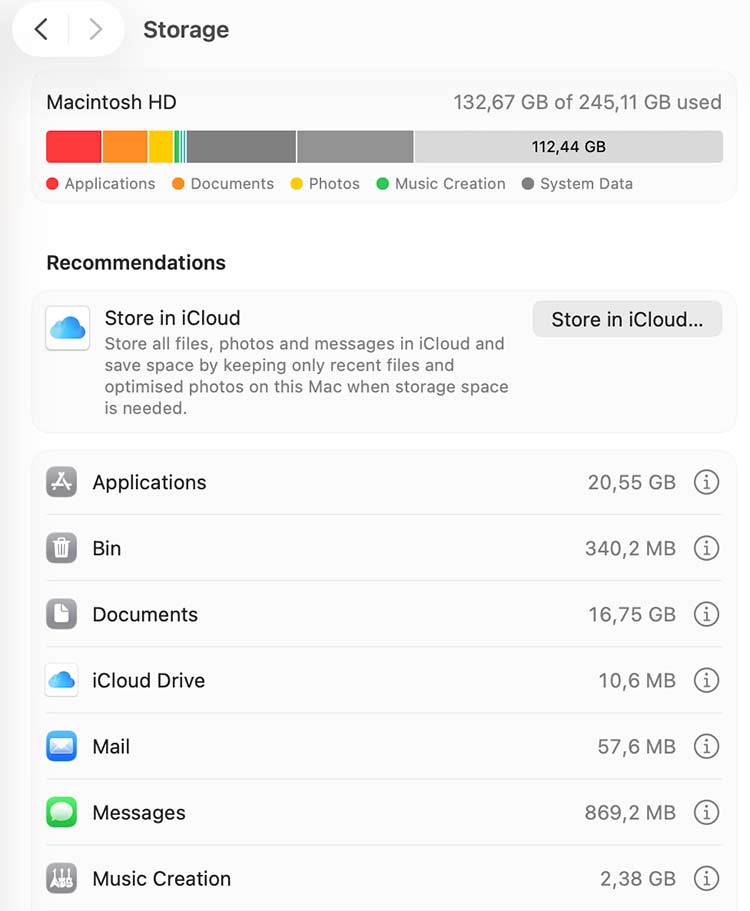
The bar display reveals storage distribution across Apps, Documents, macOS, and System Data categories after a brief delay.
2. Use macOS Built-in Storage Management Tools
macOS provides users with strong built-in tools to handle storage optimization tasks through native features that eliminate the need for software installations. These built-in utilities help Mac users locate their biggest files, unused space, and guide them to clean up their Mac system. The Recommendations panel displays three optimization recommendations in its top section:
- Store in iCloud. By pressing this button, you can move documents, photos, and messages to iCloud to free up local space.
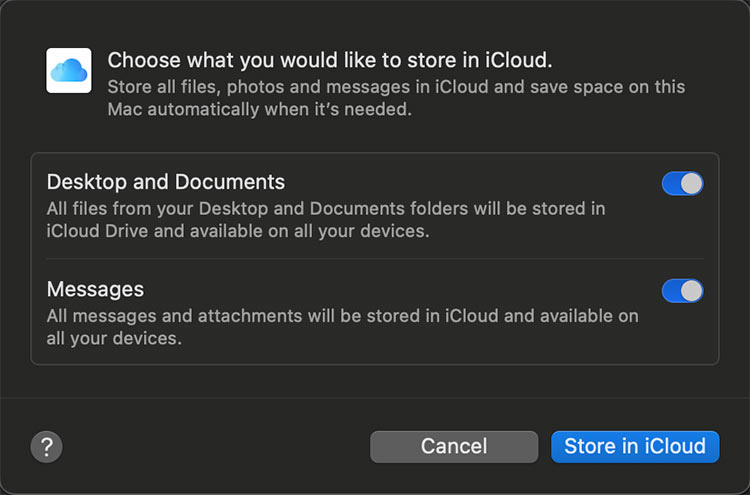
- Optimize Storage. This feature automatically removes Apple TV movies after you watch them and discards local email attachments that are no longer needed.
- Empty Trash Automatically. Set your Trash to clear items that have been there for 30 days.
Review large files, downloads, and unsupported apps for removal in the Reduce Clutter section. You can activate any of these recommendations through a simple button click.
3. Delete Unnecessary Files and Applications
Some cleanup Mac operations must be performed manually, even with the built-in tools of macOS. The operating system gradually collects seldom-used files together with unused applications, which consume storage space and create performance slowdowns. Clearing up space on a Mac regularly helps your system maintain its efficiency and lean operation.
Identify Large and Unused Files and Delete Them
Start by locating files that occupy the most space. You can find large files using Finder’s Search Filters:
Open Finder, select the folder on the left of the screen. It can be Recents, Applications, or the Downloads folder. Sort by Size. In Finder, press the appropriate icon to choose sorting by size.

Check the Downloads folder. Often, it contains numerous outdated documents and media files. You can move them to the Trash Bin. If there are documents and files that you use rarely, but need later, transfer them to an external hard drive or cloud storage.
Next, review your Applications folder. Creative and productivity apps can be especially large because they include extra libraries and resources. Drag unused apps to the Trash, then delete related files from ~/Library for a complete uninstall – or use a trusted removal tool to do it safely.
4. Clear Cache and Temporary Files
Mac stores temporary files along with cached data, which applications, browsers, and system functions create throughout time. These files help speed up certain operations, yet they tend to accumulate to unnecessary sizes that consume storage resources.
Perform manual cache deletion for applications and system components.
- Open Finder.
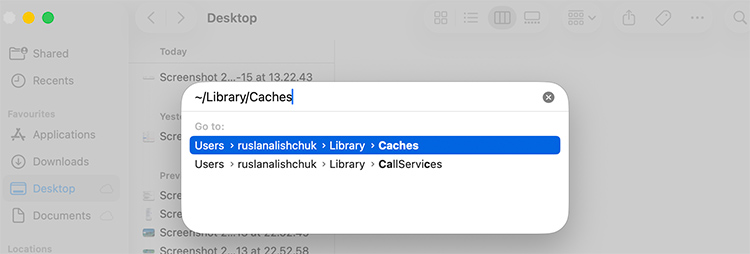
- Press Shift + Command + G keys at one time, and the Go to Folder window will pop up.
- In the command line of the Go to Folder window, enter ~/Library/Caches into the search field, then press Enter.
- This action will open the folder with the cache on your Mac.
- This folder will contain a lot of other folders titled like your apps, for example, com.google.chrome.
- Enter this folder and delete all the files.
Important: Don’t delete the whole Caches folder, as well as the cache of system files. Most com.apple named folders can be system ones.
5. Manage Your Images, Photos, Videos, and Music
The largest storage consumers on Mac computers exist within media file categories. The organization of files, together with moving files that you don’t need access to, will create available storage space.
Review Your Photos Library
- Open Photos and delete duplicates or blurry shots.
- To save storage space, select Photos > Settings… > iCloud > Optimize Mac Storage for local storage of compressed images while storing full-resolution images in iCloud.
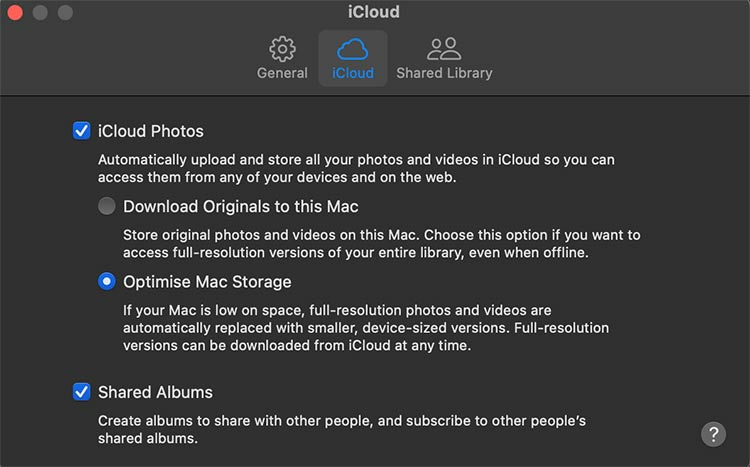
Offload Large Video Files
Videos occupy significantly larger storage capacity than photographs. Consider moving old clips to:
- External hard drives
- iCloud Drive or another cloud service
Optimize Music Storage
- Check the Music app settings to identify tracks that you can stream instead of downloading.
- The removal of unneeded playlists, together with albums from the collection.
6. Remove Old iOS Backups and Time Machine Snapshots
As you know, the backups you created by connecting your iPhone or iPad to your Mac remain stored on your device.
- Open Finder and navigate to Locations (your iPhone or iPad should be connected).
- In Locations, you can select your device to access the Manage Backups option for deleting unnecessary backups.
Time Machine creates local snapshots when your backup drive is not connected.
- Open Terminal to view local snapshots by typing tmutil listlocalsnapshots /
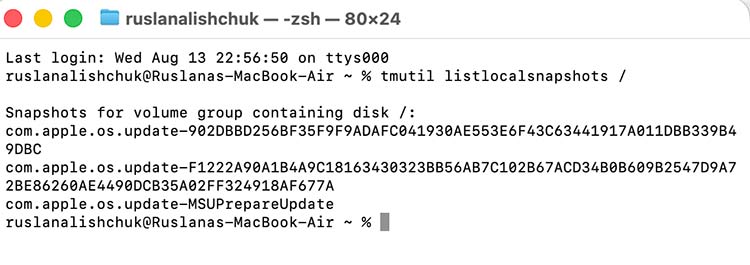
- There will be files with the name, for example, com.apple.TimeMachine.2025-08-14-123456.
- Followed by sudo tmutil deletelocalsnapshots snapshot-name to delete them.
- If there are no files with the name like in the second item, there are no local snapshots.
7. Empty the Trash and Restart
File removal does not result in space availability until the user empties the Trash.
Empty the Trash
Click the Trash icon with the right mouse button and choose Empty Trash. Users who don’t want to waste their time on this routine should activate Empty Trash Automatically from the Storage Management panel.
Restart Your Mac
The system clears temporary files during a restart to make available space visible right away.
Prevent Future Storage Problems
If you don’t want to have problems with the productivity of your Mac because of full storage, then take preventive measures.
1. Set a calendar reminder to:
- Review large files
- Empty downloads
- Clear caches
2. Use Cloud or External Storage. The storage of seldom-used files should be done through iCloud, Dropbox, Google Drive, and external hard drives.
3. Monitor Your Storage regularly. Check the Storage Settings panel on a regular basis to detect space problems before they become critical.
Conclusion
Now you know how to clear up storage on a Mac. Its cleanup demands more than file deletion because it requires monitoring storage usage and selecting important items to keep while developing routines to stop future clutter buildup. The combination of macOS built-in tools with manual steps helps you recover storage space while improving performance and getting your Mac ready for upcoming tasks.


